
 Facebook
 X
X
 Pinterest
 Copy Link
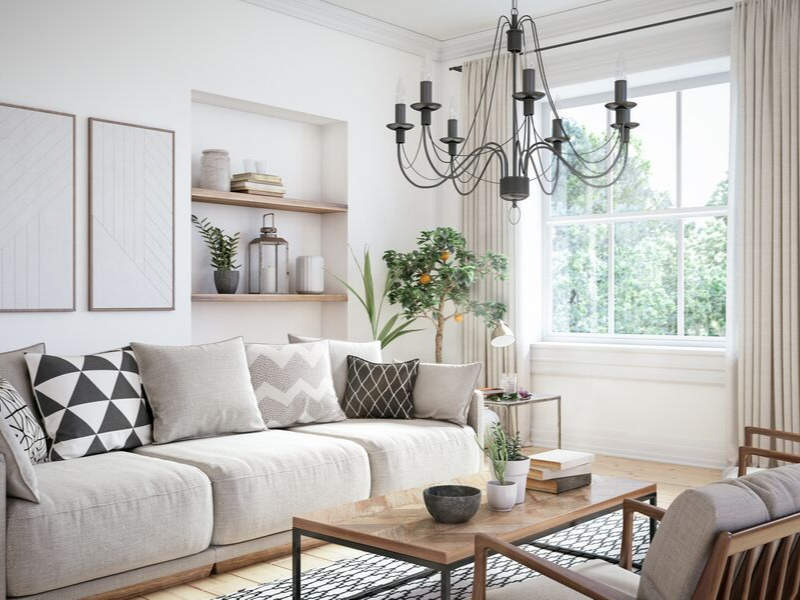
You’ve Moved into Your New Home. Now What?


Congratulations on your new home! You made it through the arduous process that is buying a new home. Now it’s time to take on the task of moving in.
You did your research about the neighborhood and you feel like you know the home like the back of your hand. However, there are some things to do as you move in to protect your newest investment, and yourself, from the unknown variables in and around your home.
Change the locks garage door codes
Previous owners might have changed the locks, but they may not know who all has a key or a code to open your garage, especially neighbors who they trusted to watch their place while they were away. Changing the codes and locks on all the doors ensures that you have complete control over entry to your home
Check or Install Fire and Carbon Monoxide Detectors
If the home already has fire and carbon monoxide devices, make sure they are in working order by testing each one with the tester button. Keep a note of when to replace them as well.
If they don’t have them, install a device in each sleeping room, as well as common areas like the living room or kitchen. Hallways are a great place to cover multiple rooms with one detector as well.
Install a security system
Enjoy total peace of mind with a new security system. Meet with a consultant on the best ways to protect your home for a system that works best for you and your lifestyle.
There are also app-connected systems that you can set up yourself that notify you of movement on the cameras or doors and windows opening.
Meet the neighbors
Build a sense of community and get to know the lay of the land by knocking on neighbors’ doors to get to know them. Bring a small gift as a “thank you” for dealing with the moving trucks. This is a great initial step for figuring out who you can trust to watch things while you’re away should you need a helping hand in the near future.
The Impact of Staging Your Home

For more than 20 years, the benefits of staging a home have been well documented. Numerous studies show that staging helps sell a home faster and for a higher price. According to the National Association of REALTORS®, 88 percent of home buyers start their search online, forming impressions within three seconds of viewing a listing. When a home is well staged, it photographs well and makes the kind of the first impression that encourages buyers to take the next step.
Studies also indicate that buyers decide if they’re interested within the first 30 seconds of entering a home. Not only does home staging help to remove potential red flags that can turn buyers off, but it also helps them begin to imagine living there. Homes that are professionally staged look more “move-in ready” and that makes them far more appealing to potential buyers.
According to the Village Voice, staged homes sell in one-third less time than non-staged homes. Staged homes can also command higher prices than non-staged homes. Data compiled by the U.S. Department of Housing and Urban Development indicate that staged homes sell for approximately 17 percent more than non-staged homes.
A measurable difference in time and money
In a study conducted by the Real Estate Staging Association in 2007, a group of vacant homes that had remained unsold for an average of 131 days were taken off the market, staged, and relisted. The newly staged properties sold, on average, in just 42 days, – which is approximately 68 percent less time on the market.
The study was repeated in 2011, in a more challenging market, and the numbers were even more dramatic. Vacant homes that were previously on the market for an average of 156 days as unstaged properties, when listed again as staged properties, sold after an average of 42 days—an average of 73 percent less time on the market.
Small investments, big potential returns
Staging is a powerful advantage when selling your home, but that’s not the only reason to do it. Staging uncovers problems that need to be addressed, repairs that need to be made, and upgrades that should be undertaken. For a relatively small investment of time and money, you can reap big returns. Staged properties are more inviting, and that inspires the kind of peace-of-mind that gets buyers to sign on the dotted line. In the age of social media, a well-staged home is a home that stands out, gets shared, and sticks in people’s minds.
What’s more, the investment in staging can bring a higher price. According to the National Association of REALTORS, the average staging investment is between one percent and three percent of the home’s asking price, and typically generates a return of eight to ten percent.
In short, less time on the market and higher selling prices make the small cost of staging your home a wise investment.
Interested in learning more? Contact me for information about the value of staging and referrals for professional home stagers.
Windermere Teams Up with the Seahawks to #TackleHomelessness

Windermere is proud to partner with the Seattle Seahawks for the fourth season to help #TackleHomelessness. For every Seahawks home game defensive tackle, Windermere will donate $100 to Mary’s Place, whose mission is to help families on their journey out of homelessness. To date we’ve raised nearly $100,000 through our #TackleHomelessness campaign and we’re looking forward to raising even more for our friends at Mary’s Place!
The Slow Down in Foreign Buyers

The United States housing market is experiencing a significant reduction in foreign buyers. Windermere Chief Economist, Matthew Gardner, cites several factors that could be contributing to this trend and offers his opinions as to what to expect in this recent Market Update.
Extend the Life of your Roof
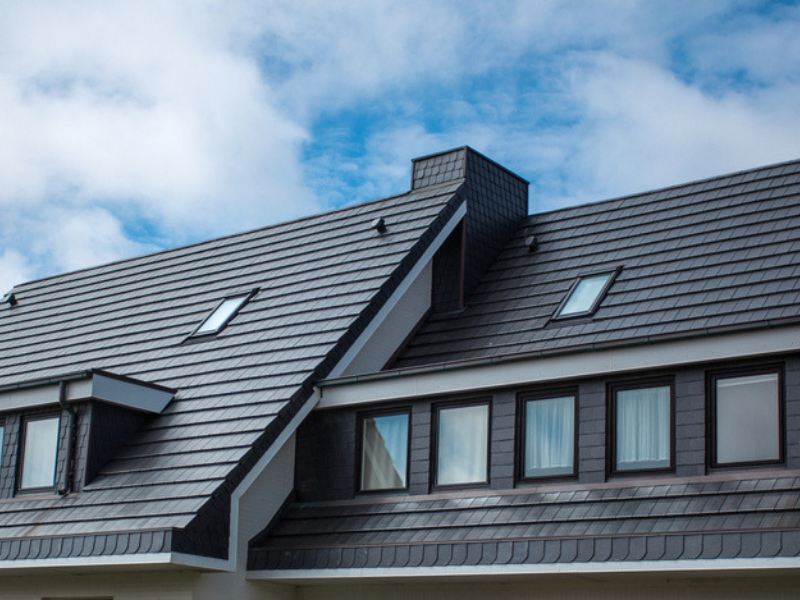

Your roof is one of the most important and expensive assets of your home, but no other element is quite as valuable. While the average lifespan of a roof is about 15 years, careful homeowners can extend the life of their homes without enduring too many hardships. Take a look at these three quick maintenance tips to help your roof last.
Keep Your Gutters Clear
Debris that accumulates and clogs your gutters adds extra weight and pulls at your roof’s fascia, which can be a costly fix. Look down the length of your roof for any signs of sagging or bending – that’s a sure sign your gutters are carrying too much weight and pulling at your roof.
Don’t forget the downspouts either, and don’t be fooled by easy-flowing water. Moss and algae buildup on and around your roof can slowly eat away at your roofing material and severely compromise its integrity.
Focus On The Attic
The exterior of your roof isn’t the only area you should focus on as your attic is your roof’s first line of defense against damage with a two-pronged approach: insulation and ventilation.
Insulating your attic has the double benefit of keeping your home’s internal temperature consistent while also preventing vapor and moisture buildup on the underside of your roof. When combined with proper ventilation your attic can stay dry and keep your roof’s rafters safe from moisture damage.
A great way to keep properly ventilate is to add a fan or dehumidifier to the attic.
Catch Problems Early
Check on your roof regularly, an easy time to remember to check is with every change of the season, or after a significant storm. Catching small issues early on will save you money in the long run, so utilizing the services of a reliable, professional roofer is an invaluable asset. As with any working professional, it’s a good idea to establish a working relationship with a roofer and even consider scheduling a yearly checkup for your roof just to make sure there aren’t any problems sneaking up on you. After all, spending a little each year to maintain your roof is a lot better than dropping $15,000-$50,000 on a new one, right?
Protect Your Home With Homeowners Insurance


In addition to providing shelter and comfort, our home is often our single greatest asset, and it’s important that we protect that precious investment. Most homeowners realize the importance of homeowner’s insurance in safeguarding the value of a home. However, what they may not know is that about two-thirds of all homeowners are under-insured. According to a national survey, the average homeowner has enough insurance to rebuild only about 80% of his or her house.
What a standard homeowners policy covers
A standard homeowner’s insurance policy typically covers your home, your belongings, injury or property damage to others, and living expenses if you are unable to live in your home temporarily because of an insured disaster.
The policy likely pays to repair or rebuild your home if it is damaged or destroyed by disasters, such as fire or lightning. Your belongings, such as furniture and clothing, are also insured against these types of disasters, as well as theft. Some risks, such as flooding or acts of war, are routinely excluded from homeowner policies.
Other coverage in a standard homeowner’s policy typically includes the legal costs for injury or property damage that you or family members, including your pets, cause to other people. For example, if someone is injured on your property and decides to sue, the insurance would cover the cost of defending you in court and any damages you may have to pay. Policies also provide medical coverage in the event someone other than your family is injured in your home.
If your home is seriously damaged and needs to be rebuilt, a standard policy will usually cover hotel bills, restaurant meals and other living expenses incurred while you are temporarily relocated.
How much insurance do you need?
Homeowners should review their policy each year to make sure they have sufficient coverage for their home. The three questions to ask yourself are:
· Do I have enough insurance to protect my assets?
· Do I have enough insurance to rebuild my home?
· Do I have enough insurance to replace all my possessions?
Here’s some more information that will help you determine how much insurance is enough to meet your needs and ensure that your home will be sufficiently protected.
Protect your assets
Make sure you have enough liability insurance to protect your assets in case of a lawsuit due to injury or property damage. Most homeowner’s insurance policies provide a minimum of $100,000 worth of liability coverage. With the increasingly higher costs of litigation and monetary compensation, many homeowners now purchase $300,000 or more in liability protection. If that sounds like a lot, consider that the average dog bite claim is about $20,000. Talk with your insurance agent about the best coverage for your situation.
Rebuild your home
You need enough insurance to finance the cost of rebuilding your home at current construction costs, which vary by area. Don’t confuse the amount of coverage you need with the market value of your home. You’re not insuring the land your home is built on, which makes up a significant portion of the overall value of your property. In pricey markets such as San Francisco, land costs account for over 75 percent of a home’s value.
The average policy is designed to cover the cost of rebuilding your home using today’s standard building materials and techniques. If you have an unusual, historical or custom-built home, you may want to contact a specialty insurer to ensure that you have sufficient coverage to replicate any special architectural elements. Those with older homes should consider additions to the policy that pay the cost of rebuilding their home to meet new building codes.
Finally, if you’ve done any recent remodeling, make sure your insurance reflects the increased value of your home.
Remember that a standard policy does not pay for damage caused by a flood or earthquake. Special coverage is needed to protect against these incidents. Your insurance company can let you know if your area is flood or earthquake-prone. The cost of coverage depends on your home’s location and corresponding risk.
Replacing your valuables
If something happens to your home, chances are the things inside will be damaged or destroyed as well. Your coverage depends on the type of policy you have. A cost value policy pays the cost to replace your belongings minus depreciation. A replacement cost policy reimburses you for the cost to replace the item.
There are limits on the losses that can be claimed for expensive items, such as artwork, jewelry, and collectibles. You can get additional coverage for these types of items by purchasing supplemental premiums.
To determine if you have enough insurance, you need to have a good handle on the value of your personal items. Create a detailed home inventory file that keeps track of the items in your home and the cost to replace them.
Create a home inventory file
It takes time to inventory your possessions, but it’s time well spent. The little bit of extra preparation can also keep your mind at ease. The best method for creating a home inventory list is to go through each room of your home and individually record the items of significant value. Simple inventory lists are available online. You can also sweep through each room with a video or digital camera and document each of your belongings. Your home inventory file should include the following items:
· Item description and quantity
· Manufacturer or brand name
· Serial number or model number
· Where the item was purchased
· Receipt or other proof of purchase / Photocopies of any appraisals, along with the name and address of the appraiser
· Date of purchase (or age)
· Current value
· Replacement cost
Pay special attention to highly valuable items such as electronics, artwork, jewelry, and collectibles.
Storing your home inventory list
Make sure your inventory list and images will be safe in case your home is damaged or destroyed. Store them in a safe deposit box, at the home of a friend or relative, or on an online Web storage site. Some insurance companies provide online storage for digital files. (Storing them on your home computer does you no good if your computer is stolen or damaged). Once you have an inventory file set up, be sure to update it as you make new purchases.
We invest a lot in our homes, so it’s important we take the necessary measures to safeguard it against financial and emotional loss in the wake of a disaster. Homeowners insurance is that safeguard, be sure you’re properly covered.
By Meaghan McGlynn, Windermere
Preparing Your Garage for an Electric Car
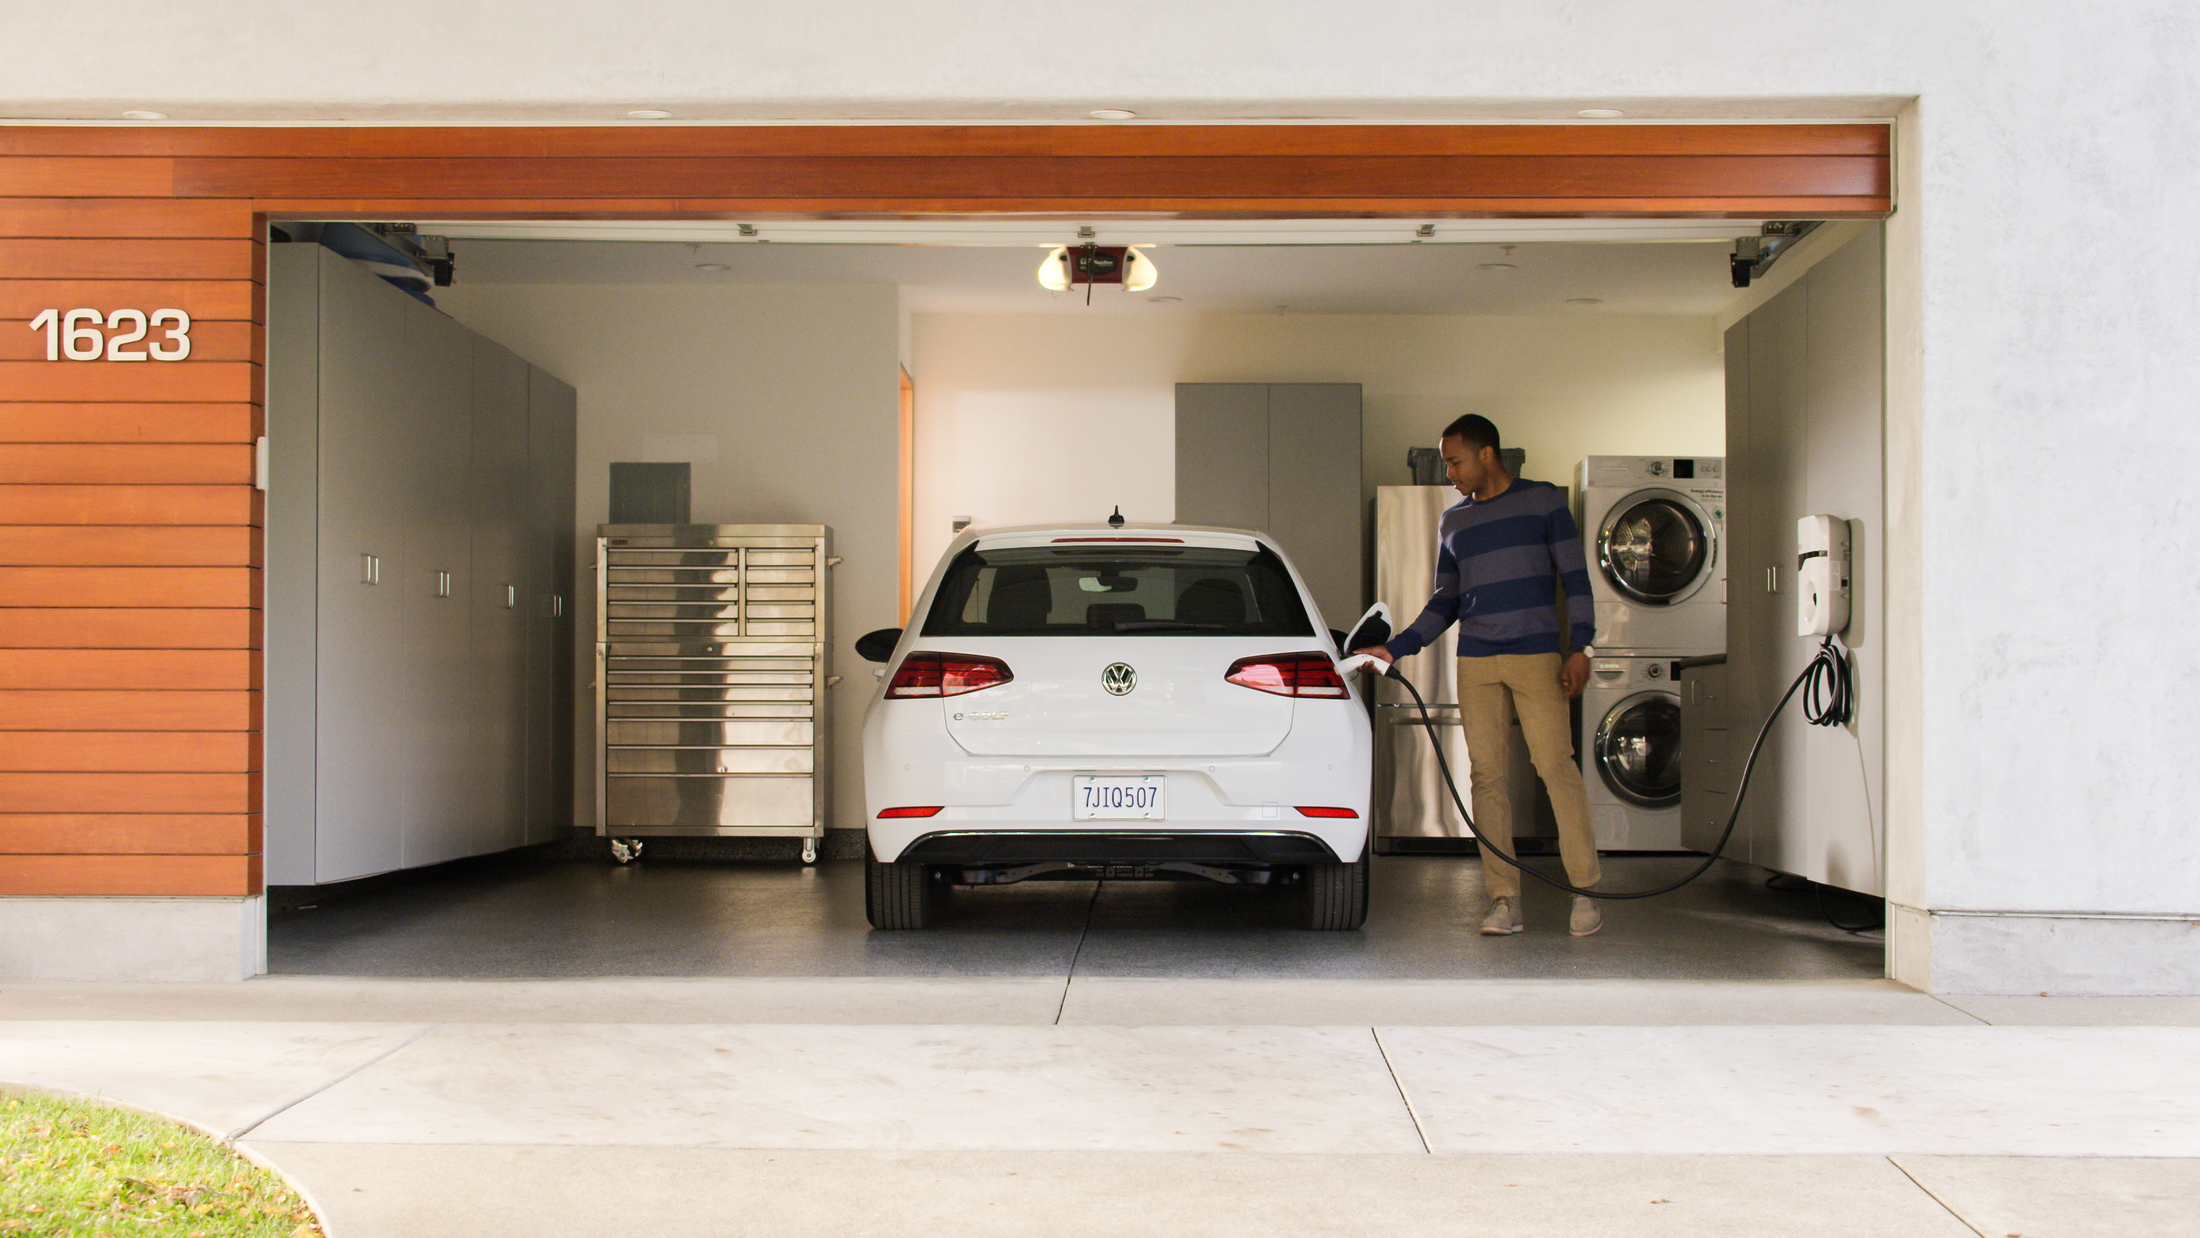

Photo Source: FleetCarma.com
Electric cars help lower emissions and fuel costs, improve fuel economy, and bolster energy security. And considering the volatility of gas prices—and their general skyward trajectory—electric fuel shows promise as an economic alternative. But switching to an electric vehicle entails more than new driving habits and a conversation piece with strangers. It’s also a lifestyle update. From setting up a charging station in the garage to maintaining optimal temperatures therein, check out these useful garage preparation tips to assure your electric vehicle battery is in tip-top shape.
Selecting a Charger: Level 1 vs. Level 2
Charging an electric vehicle is more involved than charging your smartphone, and you’ll likely need a home station charger. That said, make sure you familiarize yourself with the two main levels of electric vehicle chargers supplied by home-based charging equipment and most public charging stations so you can choose the best one for your home and car.
Level 1 Chargers
A Level 1 cord set charger delivers a standard household current of 110 or 120 volts and comes with most plug-in vehicles upon purchase. It’s outfitted with a three-pronged, household plug at one end that’s connected to a control box by a short cord. A longer 15-to-20-foot cord running from the other side of the box connects directly to the vehicle itself.
- If you have the time, a Level 1 could be the way to go. But be forewarned: What you get is, more or less, a trickle charge that affords roughly three to five miles per charging hour. For instance, the Nissan Leaf takes around 24 hours to fully charge on a standard 120-volt household outlet.
- The upside is, Level 1 equipment doesn’t entail an elaborate setup of high-power circuit breakers or dedicated electrical lines, which are required by major appliances like stoves and refrigerators.
- Because cord sets are portable, plug-in vehicles can be charged virtually anywhere there’s a standard outlet. Provided the circuit isn’t a household outlet that’s patched into the same circuit as other demanding appliances—in which case you could trip a circuit breaker.
Level 2 Chargers
You can also consider installing a Level 2 charger, which delivers 240 volts and replenishes pure electric vehicles in about three hours—which is about seven to eight times faster than Level 1 equipment. Unlike the simplicity of Level 1 setups, though, Level 2 chargers may warrant the services of a professional due to the rigmarole of electrical codes, equipment setup, and necessary inspections.
- Level 2 chargers cost anywhere between under $300 to over $1500, the price ultimately depending on cord length and amperage.
- Level 2 outputs typically range between 16 to 30 amps, but professionals often recommend around 30- to 40-amp systems—an adequate overnight charge for most plug-in electric cars.
Installing a Charging Station
It’s worth mentioning that the “charger” you’re installing is technically referred to as Electric Vehicle Service Equipment (EVSE). This is the wall-mounted box with cord and plug that delivers electricity and functions as a communication and safety unit for the actual charger situated inside the vehicle itself. The EVSE ensures the battery doesn’t overheat and shuts the charging session down if there’s a short circuit, power surge, or any other type of faulty hardware.
If you’ve opted for a Level 2 ESVE, you’ll likely need to reach out to a professional electrician to wire up equipment and determine where the ESVE should be situated in regards to where your vehicle is parked. Notwithstanding factors like outdated wiring, meters, and breaker panels, updating the garage for your electric ride should actually be pretty straightforward.
Cost of Installation
The installation cost generally hinges on the work involved—such as the amount of wire that needs to be run, whether additional or replacement breaker panels are necessary, and the cost of labor in your area. This could vary between just a few hundred dollars to a couple thousand. It’s also worth looking into your local. utility company’s offerings, as you may qualify for special rates or a rebate when you install an ESVE.
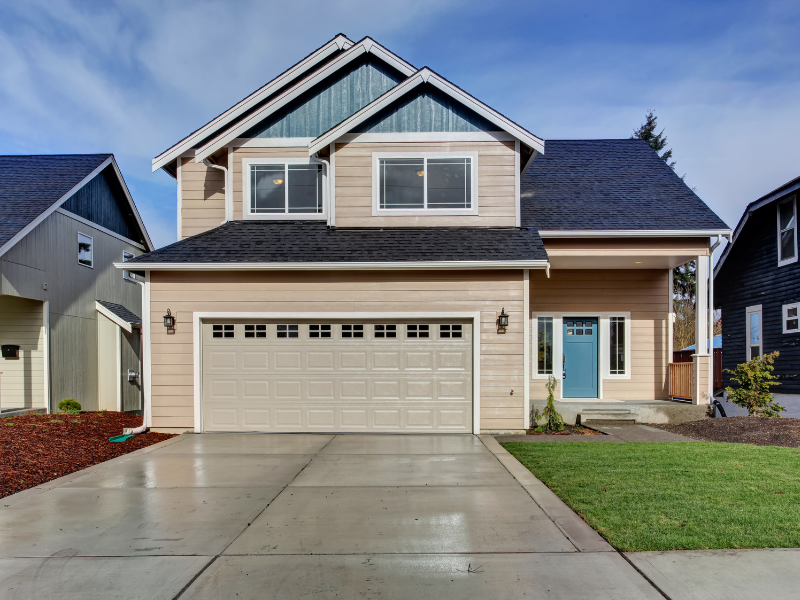
To Buy New or Old, That is the Question
 We are often asked, “Which is the better buy, a newer or older home?” Our answer: It all depends on your needs and personal preferences. We decided to put together a list of the six biggest differences between newer and older homes:
The neighborhood
Surprisingly, one of the biggest factors in choosing a new home isn’t the property itself, but rather the surrounding neighborhood. While new homes occasionally spring up in established communities, most are built in new developments. The settings are quite different, each with their own unique benefits. Older neighborhoods often feature tree-lined streets; larger property lots; a wide array of architectural styles; easy walking access to mass transportation, restaurants and local shops; and more established relationships among neighbors. New developments are better known for wider streets and quiet cul-de-sacs; controlled development; fewer aboveground utilities; more parks; and often newer public facilities (schools, libraries, pools, etc.). There are typically more children in newer communities, as well. Consider your daily work commute, too. While not always true, older neighborhoods tend to be closer to major employment centers, mass transportation and multiple car routes (neighborhood arterials, highways and freeways).Design and layout
If you like Victorian, Craftsman or Cape Cod style homes, it used to be that you would have to buy an older home from the appropriate era. But with new-home builders now offering modern takes on those classic designs, that’s no longer the case. There are even modern log homes available. Have you given much thought to your floor plans? If you have your heart set on a family room, an entertainment kitchen, a home office and walk-in closets, you’ll likely want to buy a newer home—or plan to do some heavy remodeling of an older home. Unless they’ve already been remodeled, most older homes feature more basic layouts. If you have a specific home-décor style in mind, you’ll want to take that into consideration, as well. Professional designers say it’s best if the style and era of your furnishings match the style and era of your house. But if you are willing to adapt, then the options are wide open.Materials and craftsmanship
Homes built before material and labor costs spiked in the late 1950s have a reputation for higher-grade lumber and old-world craftsmanship (hardwood floors, old-growth timber supports, ornate siding, artistic molding, etc.). However, newer homes have the benefit of modern materials and more advanced building codes (copper or polyurethane plumbing, better insulation, double-pane windows, modern electrical wiring, earthquake/ windstorm supports, etc.).Current condition
The condition of a home for sale is always a top consideration for any buyer. However, age is a factor here, as well. For example, if the exterior of a newer home needs repainting, it’s a relatively easy task to determine the cost. But if it’s a home built before the 1970s, you have to also consider the fact that the underlying paint is most likely lead-based, and that the wood siding may have rot or other structural issues that need to be addressed before it can be recoated. On the flip side, the mechanicals in older homes (lights, heating systems, sump pump, etc.) tend to be better built and last longer.Outdoor space
One of the great things about older homes is that they usually come with mature tress and bushes already in place. Buyers of new homes may have to wait years for ornamental trees, fruit trees, roses, ferns, cacti and other long-term vegetation to fill in a yard, create shade, provide privacy, and develop into an inviting outdoor space. However, maybe you’re one of the many homeowners who prefer the wide-open, low-maintenance benefits of a lightly planted yard.Car considerations
Like it or not, most of us are extremely dependent on our cars for daily transportation. And here again, you’ll find a big difference between newer and older homes. Newer homes almost always feature ample off-street parking: usually a two-car garage and a wide driveway. An older home, depending on just how old it is, may not offer a garage—and if it does, there’s often only enough space for one car. For people who don’t feel comfortable leaving their car on the street, this alone can be a determining factor.Finalizing your decision
While the differences between older and newer homes are striking, there’s certainly no right or wrong answer. It is a matter of personal taste, and what is available in your desired area. To quickly determine which direction your taste trends, use the information above to make a list of your most desired features, then categorize those according to the type of house in which they’re most likely to be found. The results can often be telling. If you have questions about newer versus older homes, contact me to learn more! This post originally appeared on the Windermere.com Blog.Improve Your Curb Appeal with These Affordable Tips

You’ll never have a second chance at a first impression, so let’s make it count! When it comes to upping your home’s curb appeal, there are plenty of small changes you can make that have a big impact. And best of all, you don’t need to call in the pros or spend a fortune to get beautiful results.
Below are some helpful and affordable tips.
A Well-Maintained Yard

Mowing: The first step to a well-manicured lawn is to mow it regularly. The experts recommending mowing high because mowing it too short can damage the grass and allow weeds to set root.
Weeds: To prevent weeds like crabgrass use a pre-emergent herbicide in early spring. These herbicides manage the weeds by stopping the seeds from sprouting in your lawn. Broadleaf weeds like dandelions can be stopped by applying granular weed control products.
Feeding: Lawns consume mostly nitrogen, so look for mixes of fast and slow release fertilizers; they will feed your lawn over time while keeping it lush and green.
Watering: Nighttime watering can result in long spans of moisture on the blades, potentially exposing your grass to disease. Consider watering your lawn in the morning – the sun helps dry out the blades throughout the day.
Flowers: You can quickly and affordably dress up your yard with colorful pre-made flower pots and containers. When placing your flower pots and containers remember that asymmetrical arrangements and staggering plants will provided the liveliest setting.
Dress up the Front Door and Porch

Paint: A fresh coat of paint in a pop color can give your home a well-deserved facelift. Get some color inspiration from House Beautiful.
Replace Old Hardware: Clean off any dirty spots around the door knob, and use a metal polish on the fixtures. Change out house numbers for an updated feel, put up a wall-mounted mailbox, or add an overhead light fixture. Keep in mind that well thought through elements, instead of mix-and-match pieces, will add the most curb appeal.
Create Perfect Symmetry: Symmetry is one of the simplest design techniques to master and is the most pleasing to the eye. Maintain symmetry by flanking your front door with two sidelights (just make sure that your hardware matches); find two urn planters or a unique visual detail to put on either side of your door.
By Meaghan McGlynn, Windermere
The Housing Market in 2019
The last time we saw a balanced market was late 1990s, meaning many sellers and buyers have never seen a normal housing market. Windermere Real Estate’s Chief Economist Matthew Gardner looks at more longer-term averages, what does he see for the future of the housing market?
This post originally appeared on the Windermere.com Blog.
